

بِسْــــــــــــــــــــــمِ اﷲِارَّحْمَنِ ارَّحِيم
السلام عليكم و رحمة الله و بركاته
My family and I aren't vegetarians but we do try to limit our intake of meat. And many, if not most of our meals are meatless. Pulses are an integral part of many culinary cultures for over centuries. This is hardly surprising because the pulses - a category that includes, among others, dried beans, peas and lentils - are not far from the "Perfect" nutritional food.
Once a upon a time I exclusively used only canned beans thinking I was doing myself (and my family) a favor by saving time. But guess what? I wasn't really doing myself a favor at all! Cooking, like our grandparents did with dried beans is a much better option.
This being my second installment of the series Kitchen MacGyver and in this post I’ll give you the why and the how of using dried beans. So, first you ask, with all the easy canned beans available in the store:

Why should I bother with using dried beans?
Well…. let me tell you:
1 - Nutritional Value: A serving of legumes contains on average at least 20% of the Recommended Daily Allowance (RDA based on a diet of 2000 calories per day) fiber, folate (the natural form of vitamin B9) and manganese, 10% of RDA of protein, potassium, iron, magnesium and copper, and 6-8% of the RDA of selenium and zinc. And modern science gives us yet more reasons to love legumes: some studies they contribute to lower cholesterol and weight, the rate of cardiovascular disease, hypertension, certain types of cancer and diabetes, and to increase the absorption of dietary fiber.Dried beans = healthy.
2 - Cost: If, added to their nutritional value, also consider their low cost. You can buy a one kilogram bag of any type bean for less than the cost of a 200gram can of beans in Algeria. And thinking back, in the US there was an even more drastic price different with a bag of 500 gram (1 pound) of beans going for less than 50 cents. Compare that to a 6oz can of beans for $1.50 or even more if you go organic. Dry beans also keep well for long periods and are suitable for many styles of cooking. Believe me, I'm still cooking from a HUGE 25kg bag of beans I bought 3 years ago!!!! And with the final cost breakdown I can fed my family of 6 a nourishing meal for roughly 200 dinars (without meat) you can't beat that.
Dried beans = cheap.
3 - More natural: Canned beans can last several years in their cooked state, thus, they have added preservatives. By contrast, when you use dry beans that you cook yourself, you can know exactly what ingredients you've added and how the beans have been prepared. Dry beans are purchased and cooked in a more natural and controlled state.
Dried beans = more natural
4 -BPA: BPA or ‘Bisphenol A’ is a chemical that has been used to make plastics linings since the 1950s. If you’re into heavy organic chemistry, it’s all over here on Wikipedia. BPA is thought to have many negative effects on your health. It's not worth the risk, especially if you're pregnant, breastfeeding or have children.
Dried beans = no BPA.
5 -Sodium: Canned beans generally have A LOT of sodium, a.k.a. salt. You can buy some “reduced” sodium canned beans but I'm pretty sure it still contains lot more salt then the body needs.
Dried beans = less salt intake.
6- Less Waste – Those who are environmentally conscious will appreciate the fact that dry beans use less packaging than cooked beans, thereby contributing less waste to landfills. Yes, cans are recyclable but isn't it better to just not create the waste from the first place. I think here in Algeria recycling is in its infancy and the country struggles with a HUGE trash problem. Why not help it along and just NOT CREATE more treash?
Dried beans = less trash.
7- Less Space: Dry beans generally take up less space in your pantry opposed to bulky cans, which is essential for people like me who have small kitchens and not much space for storing food.
Dried beans = more space
So all around dried beans have more of the stuff you want and less of the crap you don't!

So now that you know the WHY let's get to the HOW of beans.
STORING DRY BEANS
Store your beans in a sealed container, in a dark, cool and dry place. Be sure to keep your beans away from humid places like that cabinet above your stove. If stored properly, dried beans can last up to three years. Use a marker and date your beans when you open them…because no, you won’t remember in a year from one when you bought them!
HOW TO MEASURE BEANS
Some guidelines it comes to figuring out the portion serves for beans.
Use a standard 1 cup - 240ml coffee mug for easy "eye measuring".
- 500g or 1 pound of beans measures about 2 cups (2 coffee mugs)
- For every 1 cup of dry beans soak in 4 cups of water
- Beans double in volume when soaked.
- And triple in volume after being cooked.
- A cup of dry beans yields 3 cups cooked.
- A pound of dry beans yields 6 cups cooked.
- Use 3 cups of water per cup of dry beans for soaking.
- 500g or 1 pound of dry beans makes about 9 servings of baked beans.
- 500g or 1 pound of dry beans makes about 12 servings of bean soup.
- 500g or 1 pound of dry beans makes about 9 servings of bean stews like Loubia b'hlam.
REHYRATING BEANS
Generally, there are 3 ways to rehydrate beans: The traditional (and best) long soak method, the quick soak method and the super speed method. Soaking removes indigestible sugars that are the cause of the *unsavory* side effects of beans known as gassiness. And it also reduces the cooking time.

SORTING AND RINSING THE BEANS
Take a look at your beans, making sure they have no holes where insects have burrowed inside them. Sort through beans and discard any detritus, shriveled, discolored beans, stones, sticks or any other debris. This is actually a job small children think is pretty cool, so don't be shy - use that child labor. Rinse and drain the beans. Beans usually have dust from shipping or storage on them.
SOAKING THE BEANS
Now you can choose one of the three following methods but remember the key is to use plenty of water during soaking. The general rule is for every 1 cup of rinsed dry beans you need 4 cups of water. The dried beans will absorb water, start to become tender, and be ready for cooking.
There are some varieties that do not need soaking are: lentils (red, green, red, French Puy), black-eyed peas, mung, split peas (green or yellow), snow cap and soldier beans.
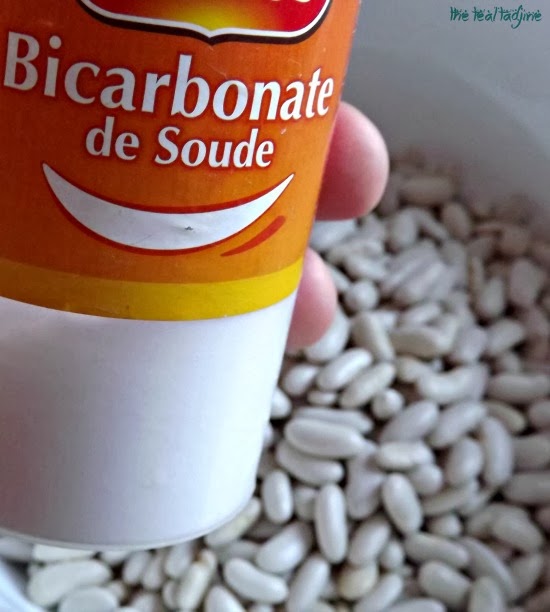
GAS REDUCING TRADITIONAL LONG SOAK:
Place the beans in a large stock pot. I usually use 500g - 1lb at a time. Add 1 teaspoon of baking soda and enough water (about 2.5 liters or 10 cups) and place on the fire. Bring up to boil and allow to continously boil for 3 up to 5 minutes. Turn off the fire, after the fire and cover the beans. Allow to soak for 12 hours or for best results overnight. Slow soaking ensures that the final product is fully cooked, not crunchy or underdone. Without any gassiness or bloating. I promise you that!
But if you're not a very organized person or just forgot use one of these quick methods:
QUICK SOAK:
Place the rinsed beans in a large pot and pour water over to completely cover. Add in 1 teaspoon of baking soda Boil for 5 minutes, then turn off the fire. Cover with a lid and allow to soak for 2-4 hours.
SUPER SPEED SOAK:
Place the rinsed beans in your pressure cooker. Add four x the water in the pot. And without the lid on, turn on the fire to a high heat. Then quickly, place the lid on the pot and lock. When the pot has reached pressure (you'll start to hear the steam and the whistling from the valve) turn down the fire and boil for about 2 minutes.
Remove the pressure cooker from the fire and place in your sink. Turn on the cold water to quick cool the out side of the pressure cooker so you can quick release the lid. Now remove the valve with a kitchen towel, taking care not to burn yourself with the steam. Allow the steam to escape before opening the pressure cooker.
RINSING THE SOAKED BEANS
Which ever method you use the water will take on the color of the beans many times and also your find some of bean skins/shells may peel off too. That's OK. When the beans have doubled in size they're ready to be used. Rising the beans after soaking is essential to removing the gas-casuing enzymes found in beans. I usually give them two good rinses before using. Cos you know I don't want to be gassy later :D
Now you're ready to cook or use the beans. As a general rule, remember 1 cup dried beans will yield 3 cups cooked.
HOW TO REDUCE THE GASSINESS
The gassy and bloating feeling is what turns off most people from eating beans, but remembering these few tips will help:
- Remember to soak the beans long enough.
- Rememeber to add baking soda to the soaking and also during the cooking process.
- Many Mediterranean countries add dried marjoram, fennel seeds, anise or ginger to the soaking, while Mexicans add epazote and Asian add kombu.
- Remember to discard the soaking water and also rinse your beans throughly.
- Remember to NOT add any salty, sweet or acidic ingrdients such as tomatoes, molasses, vinegar or even halal barley water beverages.

COOKING THE BEANS ON THE STOVEPOT
Rinse and drain your beans again. This washes away any foam or debris in the water.
Place your washed beans in a large Dutch oven, your choice of flavor enchancers (talked about below) and 3x the voume of beans. Adding some meat bones, halal bacon or sausage wouldn't hurt either. But DON'T add salt or acidic ingredients, to the soaking water or beans until they are tender. Allow the beans to simmer during the whole cooking time. Don't boil them or their skins will crack. Add more water to the pot, if needed during cooking keeping the water 2-3 inches above the beans Dried beans are like sponges and will continue to absorb water until they are saturated. Cooking times for different beans varies, but beans are generally are"cooked" after about 45-50minutes of cooking. A way to test doneness is smashing them between your fingers or with a fork. I generally test at least 5 beans, before I "decide" they're done. It's happened many times before, that the 1 or 2 beans I tested were done, but the rest not.

COOKING BEANS IN A PRESSURE COOKER
Soaking the beans in the pressure cooker isn't only fastest way to rehydrate your beans, but the fastest way to cook the beans as well. Pressure cookers can be dangerous if used improperly, so it is imperative that you buy a quality pressure cooker and follow the instructions carefully. I know they sell Made in China pressure cookers for just few thousand dinars here in Algeria but I would advise against buying anything low quality. There have been many news stories of injuries due to poor quality pressure cookers. I use this one but any French made pressure cooker while more expensive is well worth the price. (Plus it comes with a warranty)
To cook 500g or 1 pound of beans you'll need a 6-8 qt / liter pressure cooker. Add one tablespoon of oil (if you haven't already used oil with your flavor enchancers (see below) to the pot. This helps reduce the foam and keeps your valve clean and easily expelling vapors.When it comes to pressure cookers, it is important to get a tight seal on the lid and be sure the pot is not over-filled (total volume should be less than half the volume of the pot). However, it is necessary to add enough liquid to the beans to prevent burning and dehydration. A general rule, add about 3 finger's width water above the level of beans in the cooker. And with all cooking methods, you also want to avoid adding salt until after your beans have cooked.

COOKING BEANS IN A SLOW COOKER
One of the best ways to guarantee tender and flavor is cooking beans in a slow cooker. And cooking beans in a slow cooker couldn't be simpler. Just simply add your beans, flavor enchancers (see below) and 4x the water to your slow cooker. Turn on and allow to slow-cook for 4-6 hours, up to 8 hours depending on the bean type.

OVEN COOKING
Baking in the hot dry air of the oven is a slow process, but it’s the only way to create the glazed, crusty top characteristic of baked beans and bean pot casseroles. Generally, oven cooking is used in combination with cooking in a pressure cooker or in a saucepan on top of the stove. Be sure the beans are not overcooked before baking or they will be mushy.
Traditional containers for baking beans are earthenware bean pots, usually 3 liter or 3 quart size. The pot and lid should be glazed at least on the inside and must be lead-free. Be sure to get all the information on your pot before using! You can also use cast iron, glass or ceramic casseroles as an alternative. Metal baking pans are not recommended.
To bake beans, preheat the oven according to the recipe instructions - usually about 180°C - 350°F. Then combine the drained beans, seasonings, flavor enchancers (see below) liquids and any other ingredients in the bean pot or casserole. Cover it and bake for 1 to 11⁄2 hours. To brown the top of the beans, remove the lid and bake the beans 15 to 30 minutes longer.FLAVOR ENCHANCERS
Let's face it beans are pretty bland. Buuut with some key flavor enchancers really kick up your bean dishes. Even everyday frugal pantry item can turn beans into a fabulously delicious meal. If you're not aiming for vegetarian inexpensive halal meat cuts ar your best bet. Then add in your aromatics like bay leaves, onions, carrots, celery, and/ or garlic. Then your choice of herbs and spices. Here are some flavor combination I love!

For other inspiration check this out that gives suggestions for specific types of beans.
LEFTOVERS AND STORING THE BEANS
Storing cooked beans is easy. After allowing them to cool to room temperature, just put the beans in a covered container in your refrigerator and they’ll keep for up to four days. This works well if you have recipes you intend to use the beans in in the near future.
Bean dishes thicken as they cool and their seasonings continue to blend making for a better and tastier dish the next day.
Reheat beans on a low fire and stir them often. Beans scorch easily over high heat. If the beans are too thick, simply add more liquid.
You can also freeze them, but only for a short period. I usually use place my beans in 2 cup freezing bags. They keep for about a month – any longer than that and I've found they become very mushy when you thaw them. This is especially great when you want to make hummous on the fly or throw some chickpeas in your next dolma or tadjine. Before using, thaw in the refrigerator or microwave, then drain and rinse. But you know, sometimes I don't even do that I just throw them in the cooking pot frozen :)
Sometimes, I just make a batch of beans and leave them in the fridge even without a specific recipe. They’re so inexpensive and so tasty and so flexible that I’ll just add them to anything I’m preparing from salads to to dips.

Let's keep in touch! Sign up for posts delivered right to your e-mail inbox or subscribe to my feed. You can also 'like' me on Facebook, pin posts on Pinterest or follow me on Twitter for all the latest recipes and updates.
share this on


as-salaamu alaykum sister,
ReplyDeleteJazakAllah khair I find this kitchen tip very useful. I never knew what the purpose was in using bicarb when soaking beans so I always left it out, now I realise that was a big mistake I won't be doing it again insha'Allah