

Showing posts with label ::: Quick and Easy. Show all posts
Showing posts with label ::: Quick and Easy. Show all posts
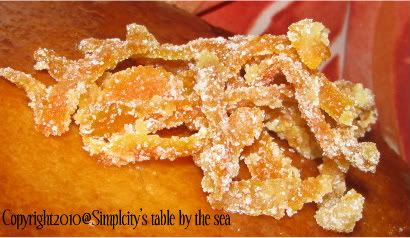
Candied orange peel express - Express écorces d'orange confite

Greetings friends out in the Blogosphere!

Today, I present in preparation for the next recipe, I would like to share my faster then usual 'express' way of candying orange peel. I have to be honest that sometimes ... no many times I get impatient in the kitchen for dishes to cook to the right doneness, I have several dishes I am preparing at once, the children need my attention ... you know how that goes!
I love garnishing dishes with the ingredients in the dish ... and that is how it should be right? Not everything can be garnished with a sprig of parsely LOL!
And candied fruits are one of my favourite garnishes. I will tell you that in my childhood you would have never gotten me to even bite into one of those gubbery looking candied fruit squares found in most Christmas cakes. Oh my, never ... but I did change my mind thanks to Jacques Pepin, ambassador to the world of French cooking. I gave candied fruits another try. And I found that I loved them! Not the factory mass produced gummy bitter fruits but the real chewy and fragrant ones made from what else? Real fruit!
But going back to my sometimes impatience in the kitchen ... just thinking of the long process of blanching, boiling, reducing, draining, then boiling some more -makes my inner child just whine!!!
So going into my brainstorming mode, I came up with a simple and quick 20minnutes or less way to candy orange peels! From peeling the oranges to dredging-and-drying, and the taste is not bad, not bad at all. Makes you wonder why waste 4- 5 hours on the longer process!
(Weeeell, OK I will admit I would and do waste the time, when I want to make chocolate covered orange peels - but only then ... and it's rare!) =p
Look for oranges with a smooth and blemish free surface. But also ones like Navels or Thomson that have a thick skin.

Express candied orange peel
- 4 oranges, washed (Navel or Thomson)
- 2 cups water
- 1 1/2 cup pure honey (or if you must 2c white sugar)
- ½ cup for rolling the candied peel in

- Scrub the orange's skin very well, sometimes orange have wax coating on them.
Thank the God here they do not!
Thank the God here they do not!

- Shred the peel into long thin strips. No need to be fancy here, the sugar will cover your less then prefect knife skills LOL!
- In a sauce pot, add the peels, honey and water.
- Bring it up to boil, then reduce the heat to medium.
- Simmer for 15m.
- Prepare a plate for sugar coating later.
- Preheat the oven to 150°.

- Carefully remove the peels ( it is HOT!) with a fork, scoop out and drain a heap of orange peels over the cooking bowl until they stop dripping,
- Then toss them lightly in the plate with the dry sugar to coat all over.
- Scoop out the peels and scatter them on a sheet of foil.
- Once all the orange peels are out of the syrup and sugar, pop the foil into the oven for 5m.
Now you are ready to use these as you like!
You can store these in a plastic food storage box or glass jar but I personally like to stick them into a large jar of sugar ... these infuse the sugar, very much like putting a vanilla bean into a jar of sugar! Orange scented sugar ... Mmmm another simple delicious pleasure!

Trick:
° For even quicker method, try this in the microwave!
° Plus donnot waste anything! Keep the orange syrup for something else–you might be making marzipan or baklava or as a cake topping or even drinks, you never know!
En français
Express écorces d'orange confite
* 4 oranges, les laver (Thomson ou Navel)
* 2 tasses d'eau
* 2 tasses de sucre blanc + ½ tasse pour laminer le zeste confit au
La peau - Frotter l'orange va très bien, parfois orange sont enduits de cire sur eux.
Nous remercions le Dieu ici, ils ne sont pas!
- Avec un couteau économe, peler la peau externe hors tension. Prenez le temps de se décolle pas la pilth. (Si vous faisiez la méthode plus longue, puis en utilisant la moelle ne serait pas question, puisque vous faites cuire la peau pendant au moins 1 heure avant qu'il ne devienne translecent. Mais, pour exprimer, vous avez besoin de quelques raccourcis!)
- Déchiqueter le zeste en longues lanières minces. Pas besoin d'être extravagant ici, le sucre sera moins couvrir vos compétences alors préfet couteau LOL!
- Dans un pot de sauce, ajouter les zestes, le sucre et l'eau.
- L'amener à ébullition, puis réduire le feu à moyen.
- Laisser mijoter pendant 15m.
- Préparer une plaque à enrober de sucre plus tard.
- Préchauffez le four à 150 °.
- Retirer avec précaution les peelings (il est chaud!) Avec une fourchette, évider et les égoutter un tas de pelures d'orange sur le bol la cuisson jusqu'à ce qu'elles cessent gouttes d'eau,
- Enrober les pelures d'orange dans le sucre.
- Supprimer les pelures et les disperser sur une feuille de papier d'aluminium.
- Une fois toutes les pelures d'orange sont hors du sirop et du sucre, de la pop la feuille dans le four pendant 5 mètres.
Maintenant vous êtes prêt à les utiliser comme tu veux!
- Dans un pot de sauce, ajouter les zestes, le sucre et l'eau.
- L'amener à ébullition, puis réduire le feu à moyen.
- Laisser mijoter pendant 15m.
- Préparer une plaque à enrober de sucre plus tard.
- Préchauffez le four à 150 °.
- Retirer avec précaution les peelings (il est chaud!) Avec une fourchette, évider et les égoutter un tas de pelures d'orange sur le bol la cuisson jusqu'à ce qu'elles cessent gouttes d'eau,
- Enrober les pelures d'orange dans le sucre.
- Supprimer les pelures et les disperser sur une feuille de papier d'aluminium.
- Une fois toutes les pelures d'orange sont hors du sirop et du sucre, de la pop la feuille dans le four pendant 5 mètres.
Maintenant vous êtes prêt à les utiliser comme tu veux!

Elhamdulillahillazee at 'amanaa wa saqaanaa wa kafaa naa wa awaa naa
I pray to you all bon appetite and always warmth of blessings around your table!
heni
Mouskoutchou Mocha

 Greetings all my friends in the Blogoshpere!
Gâteau au Yaourt or yoghurt cake is a staple in French home baking. It is known as aMouskoutchou cake here in Algeria. It is the simplest cake to make since pot de yaourt (a container of yoghurt), emptied and cleaned is used to measure out the rest of the ingredients.
I find it an excellent fun ... and tasty to make with my children! it appeals to them, much with its moist and fluffy rumb! And what child cannot enjoy a cake that they (with the exception actually putting it in the oven) can measure, mix and pour all themselves! There are no complicated steps, no scales to dig out of the cabinets. And with the intensive sandbox training they have, they are real experts at the completely emptying and filling of the yoghurt containers.
Superb I'd say!
The Gâteau Danette au chocolat noirthat I posted about a while ago, is based on this exact idea of measuring by volume not weight.
The basic Gâteau au yaourt recipe or method(which I will post about in depth at later date) is a building block to a lot of great variations. You can add chocolate, cocoa, chocolate chips, nuts, citrus juice, zest, or peel of any citrus fruit! Whatever floast your boat!
Today, I present the yoghurt cake ... a real chocolate cake from your childhood ... but all grown up!
The frosting is really not sweet at all, it has a nice intense espresso flavor, almost a bit bitter, so if you like coffee, you'll like these... if you want total sweet... I would adjust the amount of powdered sugar! Mouskoutchou Mocha
(Makes one 20cm round cake or 12 cupcakes)° Use the emptied container of youghurt for measuring
Frosting:
- - 1 container of plain yoghurt
- - 1 pot oil
- - 2 pot sugar
- - 3 pot flour
- - 3 eggs, beaten
- - 1 packet of vanilla sugar
- - 2 packets of Algerian baking powder (or 1 packet European11g)
- - 1 tablespoon of instant espresso powder dissolved in 1 tablespoon of hot
water. (Or 1 tablespoon of hot coffee)- - 1/2 cup cocoa
- - 250 g bar of very good quality dark chocolate melted
(for me Cote d'Or chocolat noir
- 1 cup cheese tartiner (Vache qui rire or LeBerbere)
- 1/3 powder sugar (if you like more sweeter frosting add 1 cup of powder sugar)
- 1 teaspoon instant espresso desolved in 1 t easpoon of hot water or. Or 1 teaspoon of hot coffee
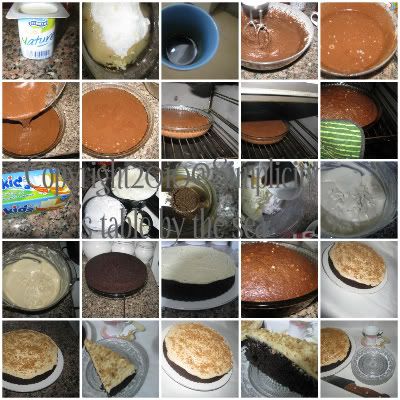
- Preheat the oven to 180.
- Spoon the yogurt into a large bowl.
- Add the oil, eggs, vanilla and sugar. and begin mixing.
- Sift the flour, cocoa and baking powder.
- Slowly add into the bowl and mix well.
- Stir in the by now (cooled) melted chocolate and coffee .
- Pour the batter into into a greased and floured cake pan. or paper lined cupcake tins (fill 2/3 of the cup).
- For cupcakes, bake 15-20 minutes, until a toothpick inserted in the center comes out clean.
For cake, bake for 15 minutes at 180C, then reduce to 150 and bake a further 20-25 minutes. Again, check for doneness by inserting a clean toothpick. - Meanwhile, whip the powder sugar, coffee and cheese tartiner until creamy.
- After the cake has cooled, spread the frosting over the top of the cake.
- Sprinkle over the frosting, shaved chocolate or crumbled dry cookies.

Elhamdulillahillazee at 'amanaa wa saqaanaa wa kafaa naa wa awaa naa
I pray to you all bon appetite and always warmth of blessings around your table!
heni
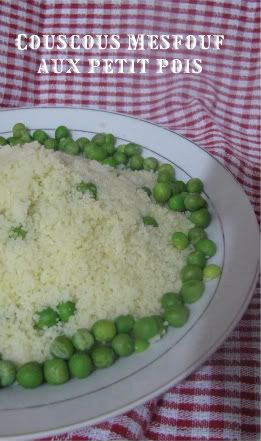
Couscous Mesfouf and Peas - Couscous Mesfouf aux Petits Pois
 Greetings all my friends out in the Blogosphere!
Friday afternoon ... traditional meal of couscous that is what we had today! And living in the Mediteranean we are eanjoying the Spring's crops even in Winter. Although with modern technology peas are availible now year round in the frozen food section. BUT still there is nothing like the sweet tenderness of in season local freshly shelled peas!
So I advice everyone that can follow this advice. Drop everything and run on the market to look for peas! The fresh pea is incomparably better than to frozen or even canned.
When you're finished, you put these little balls soft green in a saucepan, add onion and your new cover with water. Cook over medium heat for 10 minutes.
You drain your peas and then add the steamed cooked swollen couscous. Finish with a knob of butter, a little salt and some pepper.
This is real bliss! Simplicity by its best!
Preparation easy and simple, it is ideally accompanied by one (or several) large glass of lebn (buttermilk) and sweet mouscat grapes for dessert if it's the season. (Unfortunately right now they are not in season)
Ask the children or the first person that comes into the kitchen to help with the shelling.
When you're finished, you put these little balls soft green in a saucepan, add onion and your new cover with water. Cook over medium heat for 10 minutes.
You drain your peas and then add the steamed cooked swollen couscous. Finish with a knob of butter, a little salt and some pepper.
This is real bliss! Simplicity by its best!
Mesfouf couscous léger au petits pois: Mesfouf couscous with peas
- 500g of fine couscous (important that the grain is very fine)
- 1 pinch salt
- 1 TBSof olive oil
- warm water + or - 330 ml
- 150g shelled sweet peas
- 100 g de beurre 100g butter
- Fill the bottom part of the couscousier or a tall pot with water 3/4 way full.
- Place the shelled peas in the top insert part of the couscousier (or) into a colander steaming basket that can easily fit a lid on top.
- Steam the peas for about 10m or until tender.
- Meanwhile, rub the grains of couscous with the oil. Coat the grains well with the oil so they will not stick together during the steaming process.
- Place it in a large bowl then add double the amount of water as their is couscous; add salt.
- Allow to soak for about 5-8m or until the couscous has absorbed much of the water.
- Remove the peas from the steamer.
- Replace it with the cousous; add more water to the bottom part is nessasary.
- Place the top insert back onto the couscousier or large tall pot.
- Add a knob or two butter on top.
- Steam for about 10m or until fluffy.
- Turn out onto a large bowl, fluff with fork.
- Taste for salt and butteryness. Add more if needed.
- Mix in the peas.
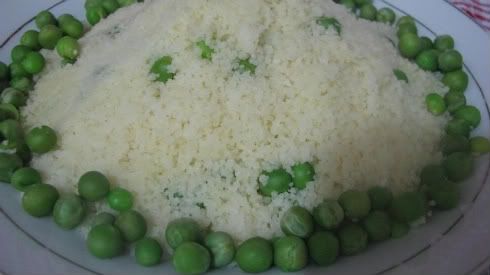
- To serve, pile the couscous onto wide rimmed bowl in a dome shape.
Tricks:
I usually place a double thick "ribbon" of aluminum foil to ensure the tight side and prevent leakage of steam. Also they sell plastic seams in the markets here for this same purpose.
Once the liquid is boiling, with a fork I will 'fluff' the couscous, it promotes the effusion of steam, promotes and accelerates cooking.
Serve with your preference of lebn (buttermilk) or warmed milk.
Serve with your preference of lebn (buttermilk) or warmed milk.

Rocher Truffles
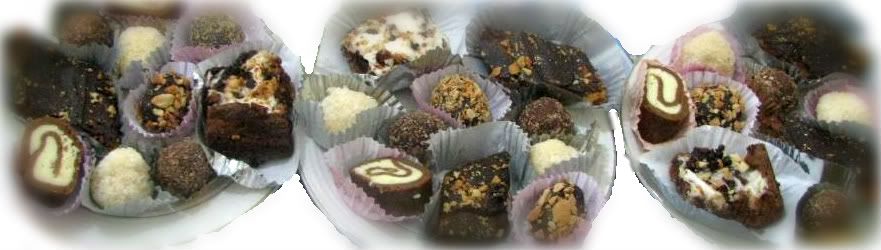
Click the picture to see the enlarged full view
As promised today, I am presenting the very easy recipe for yet another Eid gateaux I made ... Rocher truffles! You will not believe how easy this one is LOL! It's laughable! You can easily make these ahead of time ... and if any unexcepted guests arrive, simply take them out of the freezer - these are very nice cold as a frozen treat!
Here I will presenting the measurements in grams since the ingredients I bought are packaged with the metric measurement ...
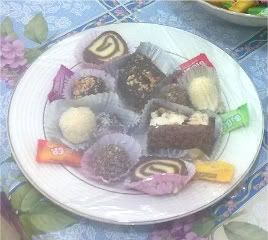
The will yield you about 50 truffles or easily 90-100 mini truffles ... so again economical petit four for entertaining that looks so luxe!
- 500g container of Nutella (I bought a 600g one - I simply added more biscuits so I used up all of the container)
- 200g of digestive milk or butter biscuits (I used the Bimo brand, 4 packets for the amount of Nutella I had)
- 100g (about half packet) of gofri cookies - otherwise known as wafer cookies (I used LU brand chocolate flavor) - for the coating
- 150g whole toasted hazelnuts (optional)
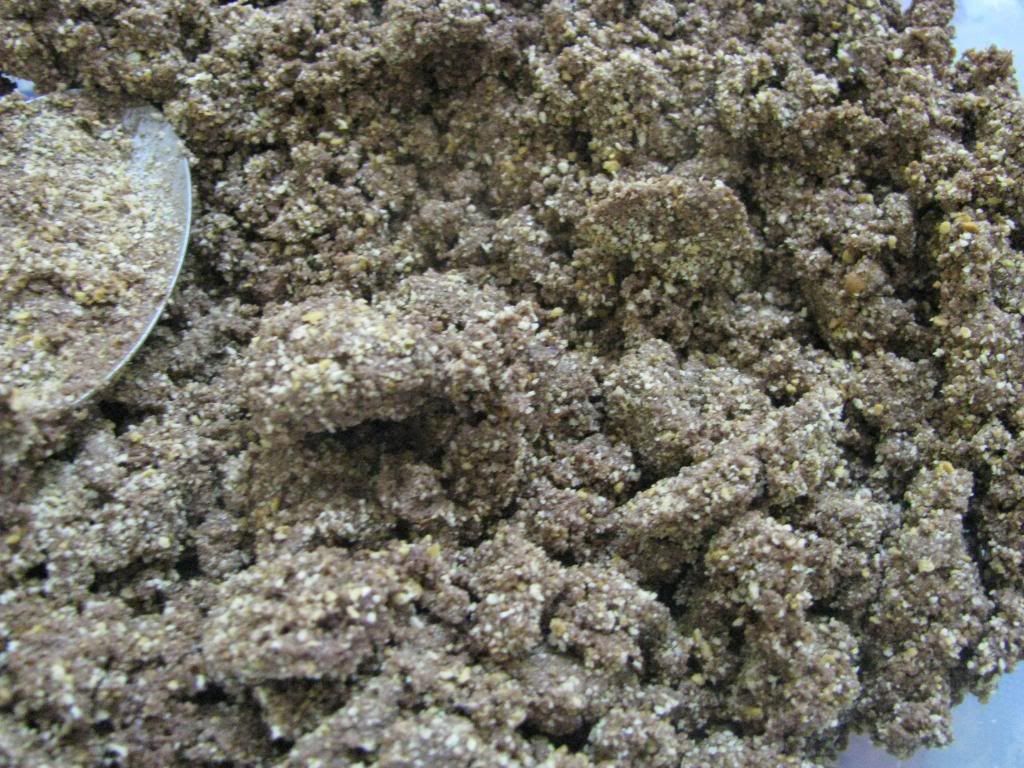 This is how the dough looks when you combine the Nutella and biscuits.
From this point, keeping mixing until a blended dough is achieved.
- Toast the hazelnuts then allow them to cool.
- Stir the Nutella until it become soft. Do not be tempted to heat it up, your truffles will not set.
- Crush the biscuits in a robo or by hand into a fine almost flour-like crumb. Set aside.
- Now crush the gofri cookies
- Mix the Nutella and biscuits until a very soft dough forms.
- Roll the dough into your desired sized balls. (After a while, the oil from the Nutella will come out so be sure to wash your hands - an oily dough will only separate)
- Insert into each ball one of the toasted hazelnuts.
- Now roll the balls into the crushed gofri cookie crumb.
- Now set the truffles into the fridge for least 30 minutes.
- Then you are ready to present them on pretty mini cupcake papers.
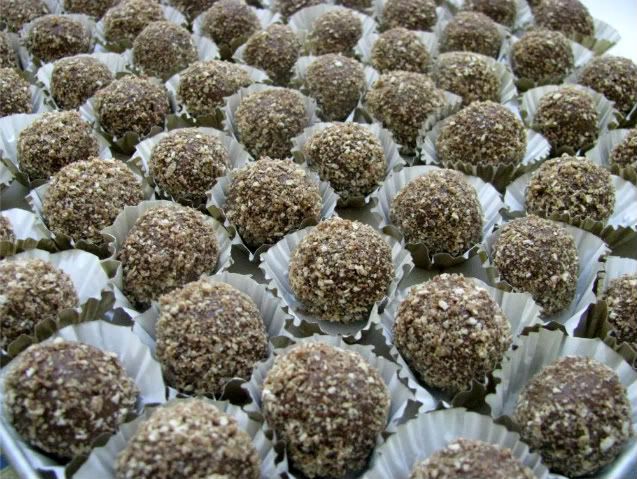 Here is what they look like from up close ... you can see the coating from the gofri cookies.
Trick:
These similar to the Raffealo truffles are easily made ahead, store well in a sealed container in the fridge or even able to freeze them. They stay nice and moist even after a week.
You can roll the truffles also in the same biscuits as in the filling, or crushed hazelnuts(as with real Rochers), other nuts, dip them chocolate, coconut, etc. The coating options are endless.
Subscribe to:
Posts (Atom)
